Build Guide
We would have to first build for web and deploy it before we can deploy other platforms. This is because other platforms would require the room URL to be shared which can’t be retrieved without deploying the front-end in most cases.
Step 1 - Initializing
Use the Agora App Builder to configure your application and click the download source code button.
Host backend and obtain the backend URL (We recommend the one-click deploy to Heroku for ease of use)
Unzip the downloaded folder
Open agora-app-builder directory
Open config.json (will soon be automated using CLI interface)
Set backEndURL to
<herokuapp url>in config.jsonSave the config.json and close editor
Open agora-app-builder folder inside a terminal
Run:
npm install(this will fetch the latest CLI tool which will start the installation process)Run:
npm start(Installation process using CLI) This process takes a while. You can usenpm run start:infoto view the logsRun:
cd <PRODUCT_ID>Run:
npm run web(For dev version)
Step 2 - Deploy web
Run: npm run web:build
This will create the built website in the
agora-app-builder/<PRODUCT_ID>/distdirectoryThis project uses react-router to perform front-end routing. So you need to configure your website host (or webserver) to redirect all the requests to index.html. We have already provided the config for two most popular SPA hosts: netlify & vercel
Copy paste the appropriate redirect file into dist (which contains index.html and js).
vercel.json (for vercel)
{
  "rewrites": [{ "source": "/(.*)", "destination": "/index.html" }]
}
_redirects (for netlify. It's just _redirects no file extension)
/* /index.html 200
Drag and drop the dist folder into netlify. (Or use the vercel CLI to deploy to vercel)
You will now get the deployed url.
Set the key frontEndURL to
<the deployed url>in config.json (of agora-app-builder directory)Run: npm start in agora-app-builder directory (rebuilds the source code with the new front-end URL)
Now any other target can be built - (IOS, Android, Mac, Windows, Linux) - This is because the Apps require the frontend URL (universal links)
Step 3 - Deploying other platforms
Windows/Mac/Linux:
- Navigate to the frontend directory
agora-app-builder/<PRODUCT_ID>/in a terminal - Create an empty folder called
.electronhere - Run
npm windowsornpm run macfor development build - For Code Signing, refer to this guide
- Run
npm run windows:buildornpm run mac:buildfor production release (exe/dmg) - The binary will be located at
agora-app-builder/<PRODUCT_ID>/out
Android:
- Connect your Android device to system with debugging on
- Type adb devices to verify if the device is connected
- Navigate to the frontend directory
agora-app-builder/<PRODUCT_ID>/in a terminal - Run
npm start– This will start the development server - Open another terminal in the same folder
- Run
npm run android- This will deploy the app on the Android device. (The app will connect to development server) - For Code Signing, refer to this guide
- To deploy, go to the
<PRODUCT_ID>/androidfolder and run./gradlew build assembleRelease
iOS:
Connect IOS device to system, create apple developer account and connect a registered iPhone/iPad
Run
npx pod-installOpen the
.xcworkspacefile located in<PRODUCT_ID>/iosfolder using XCode.Open the info tab and add the following:
Camera permission – Privacy Camera description
Mic permission – Privacy Microphone description
Add a new URI scheme – set scheme as lowercase version of PRODUCT_ID (for deep links)
Run the project by clicking the Run button in Xcode
noteSimulators won’t work since IOS simulator can’t access camera
For Code Signing, refer to this guide
Troubleshooting:
- If
npx pod-installfails, runnpm audit fixand runnpx pod-installagain - If you're getting the following error:
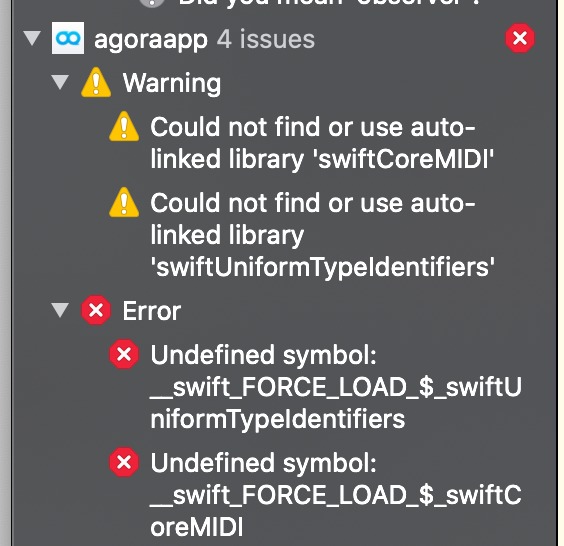
Do the following:
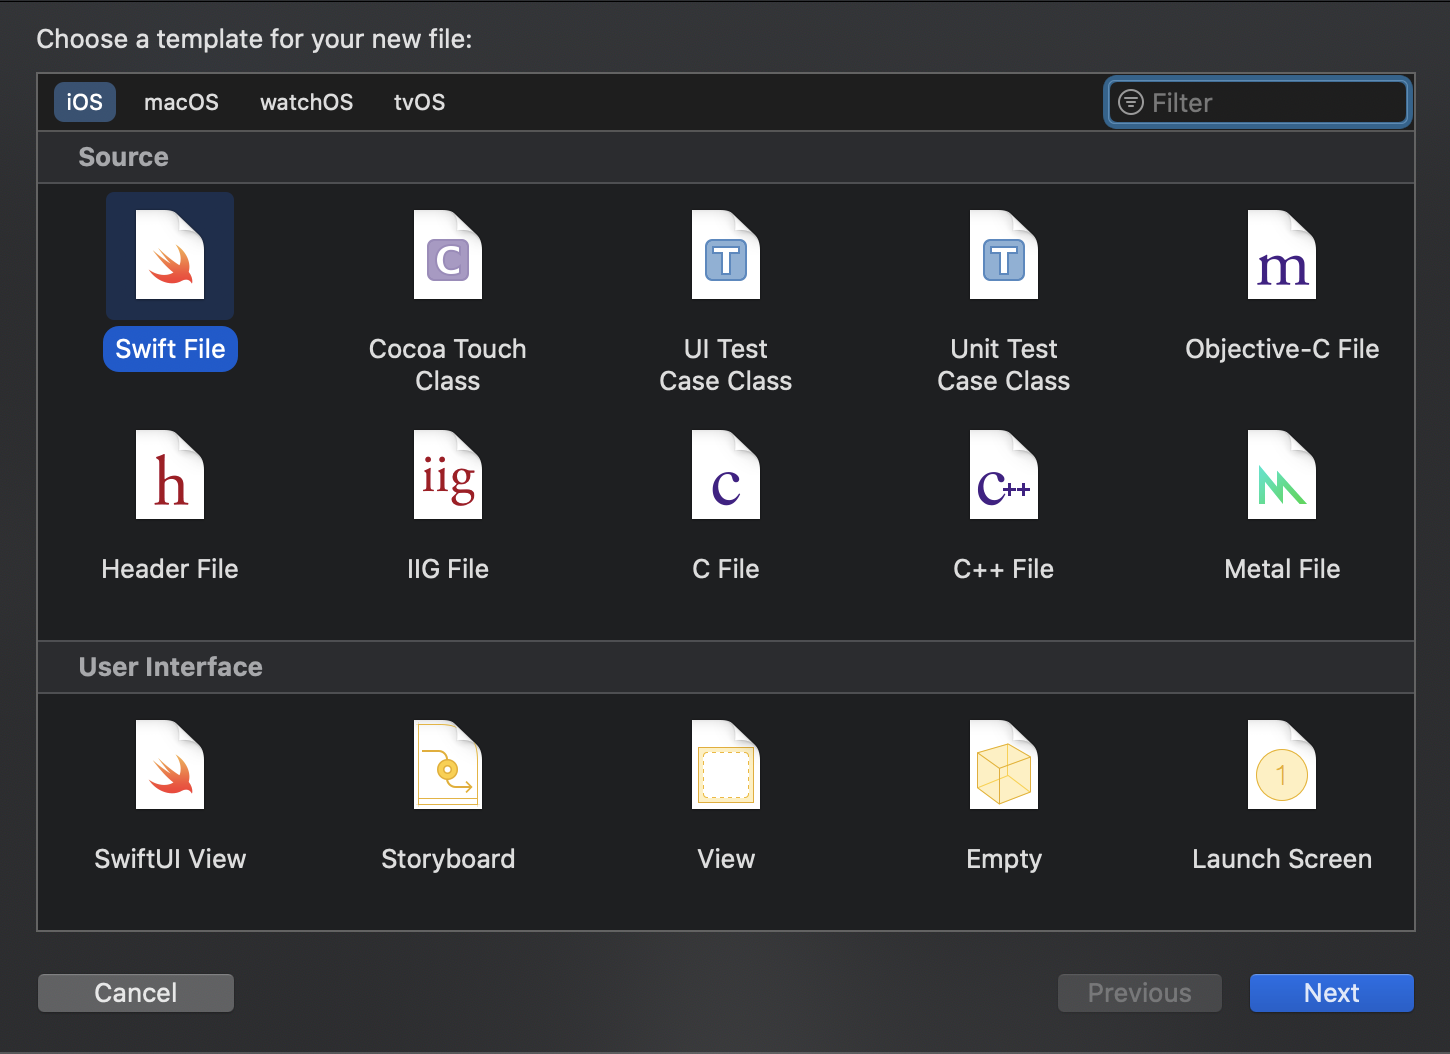
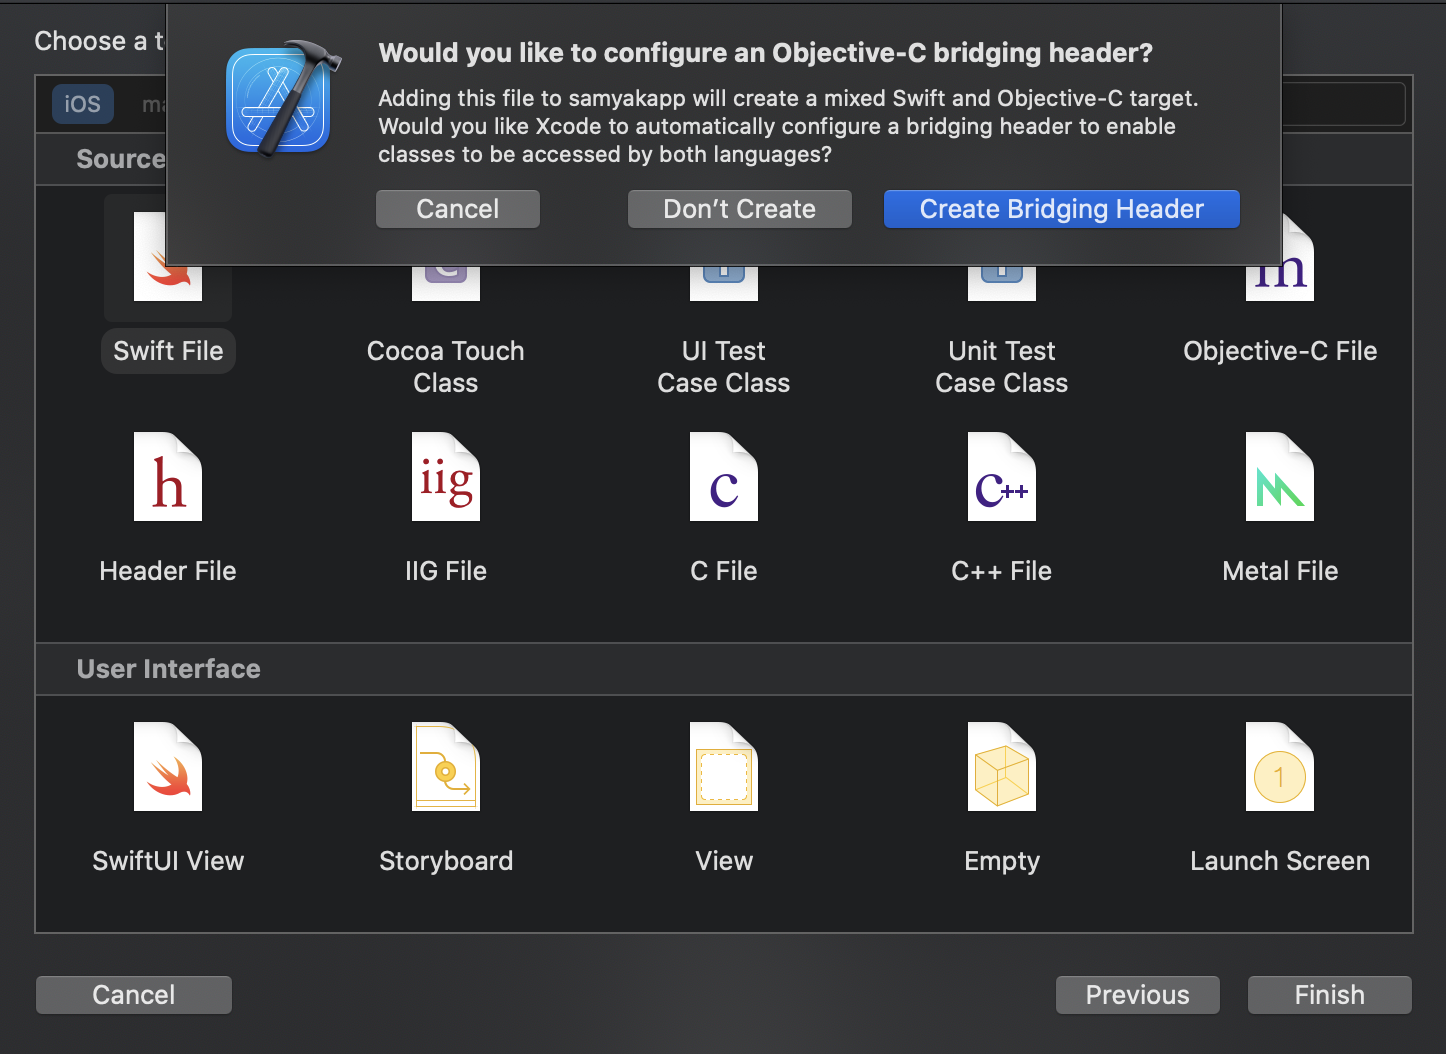
Create a new file called File.swift using xcode!
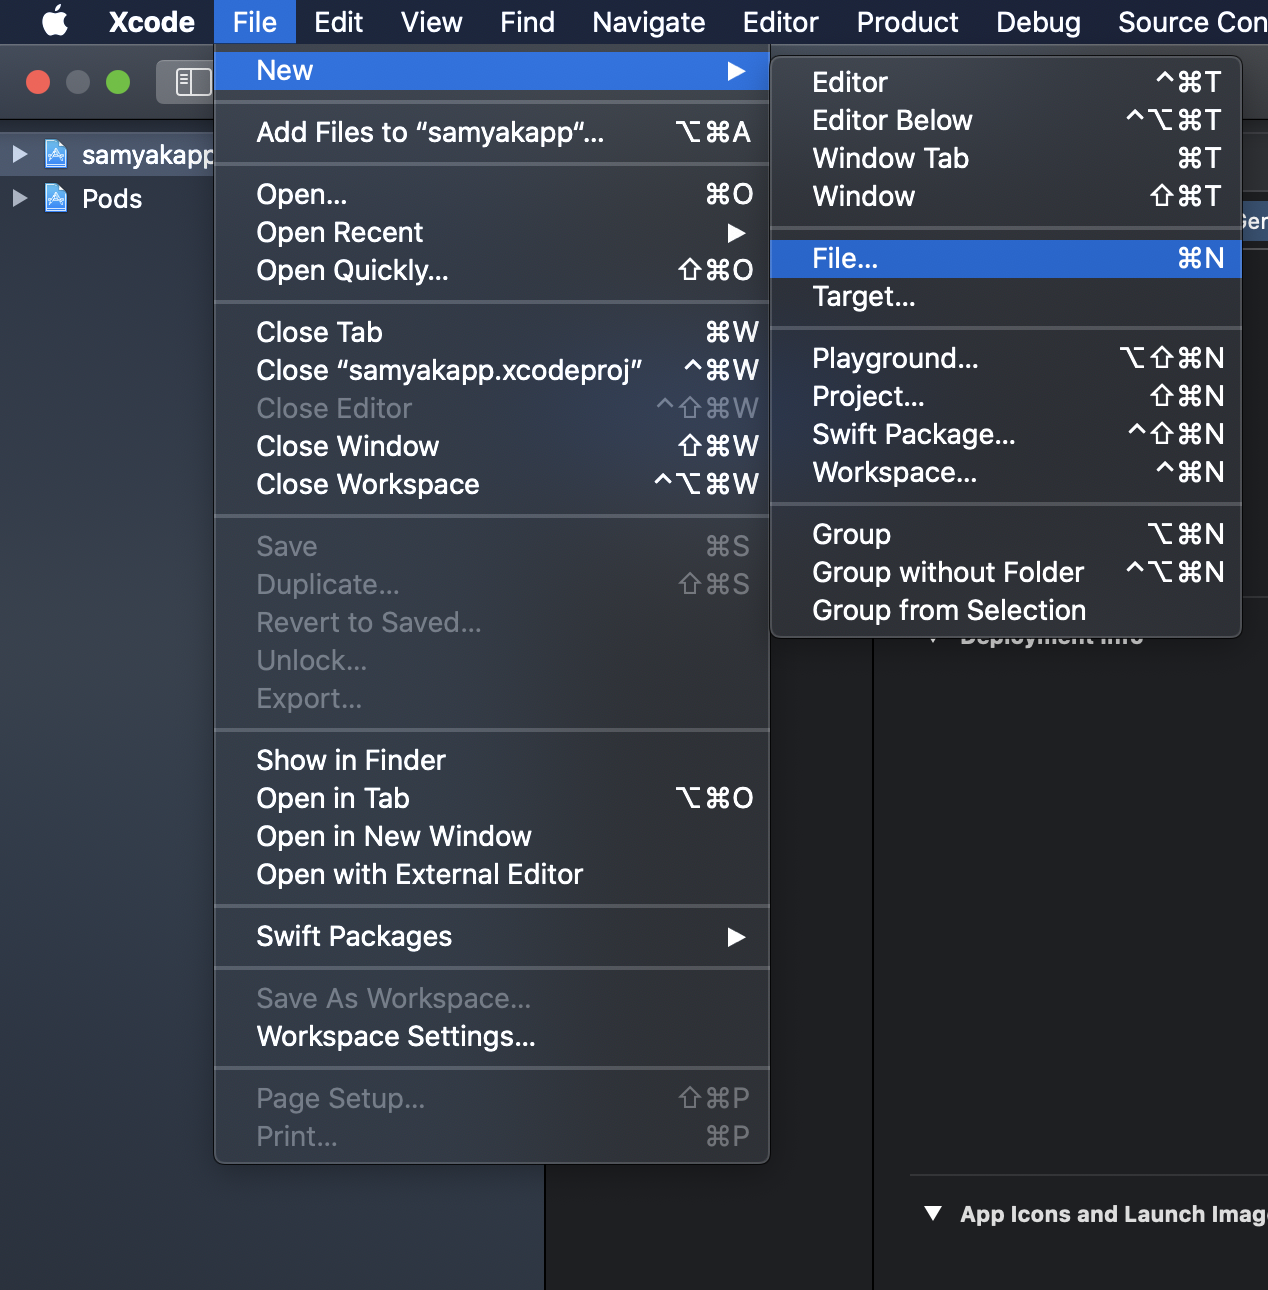
Create a swift file and click next
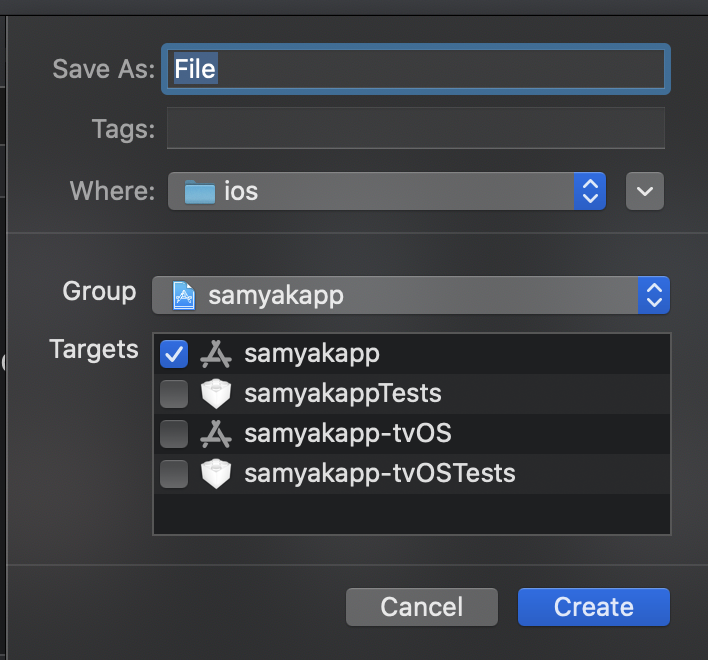
Make sure to select the option "Create Bridging Header"
If you cannot see the app changes on mobile, try clearing the metro cache. Remove
$TMPDIR/metro-cache