Enable Authentication on App Builder SDK
The following guide describes the steps to enable authentication on App Builder SDK. We will use React SDK for the example below, but the same process can be followed on other SDKs.
GENERATE API KEY
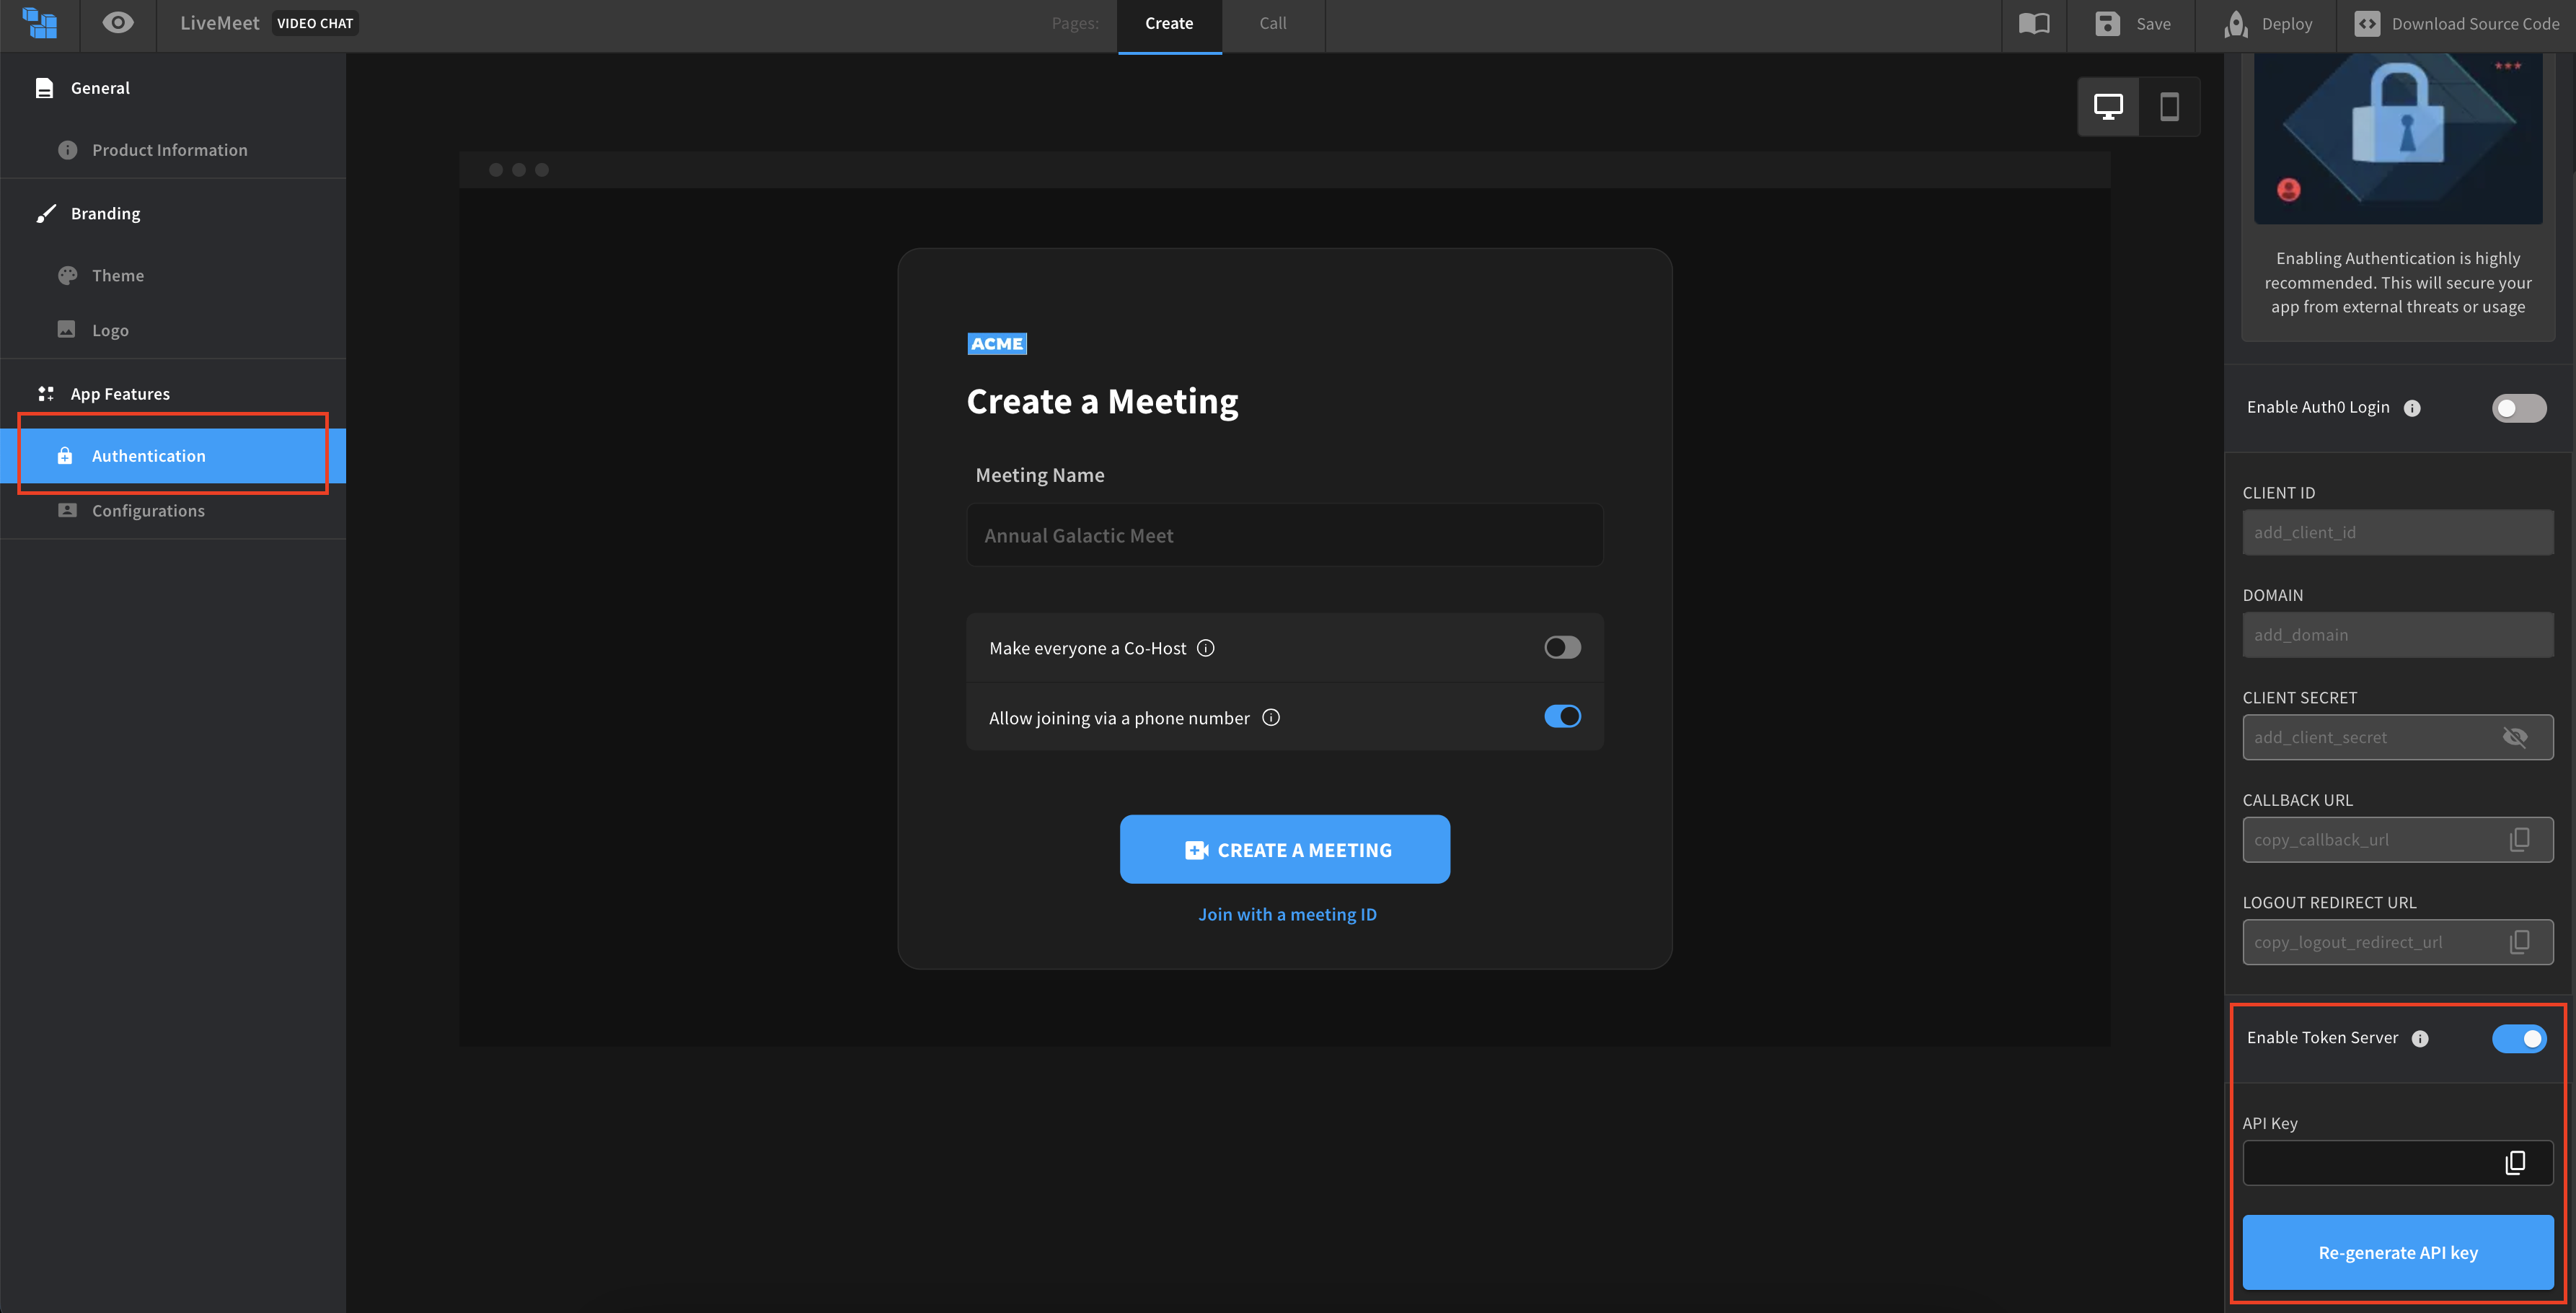
Go to the App Builder console and open the project that you want to enable authentication, Click the Authentication section on your left-hand side Enable Token Server option and Generate API Key on the right-hand side.
more details click here

Note : Don’t expose or include the API key in your front-end app. It should be securely stored in your server-side code to call App Builder APIs. This API key should be used for Server to Server API Call
Note : Once you have enabled Token Server flow Vercel deployment option will be disabled. Because Vercel deployment is applicable only for Turnkey solution
BUILDING
STEP 1
You need to download and extract the app builder source code, you can read more here.
Run the app-builder-cli in your project folder using the following command:
npm i && npm run start
STEP 2
Navigate using the arrow keys and select the Build option using the enter key

STEP 3
Select any platform which you want to integrate, after which the CLI will start the build process. This will take a few minutes.
In this example we have selected React SDK

STEP 4
Once the build is complete open a terminal window in your React project directory.

STEP 5
The app-builder-cli compiles your App Builder project into a node module inside the <Agora App Builder>/Builds/react-sdk folder. Simply install this module using the following command.
npm install <path-to-app-builder-project-folder>/Builds/react-sdk/appbuilder-react<version>-<build-hash>.tgz --force
STEP 6
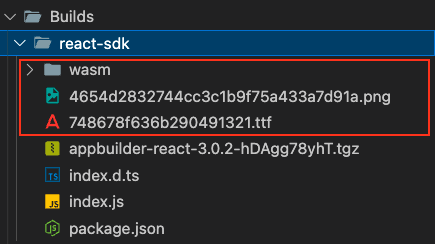
Navigate to <Agora App Builder>/Builds/react-sdk and copy the wasm folder, png and ttf files into your project's public assets folder.

CREATE CHANNEL
This Create Channel API will be useful if you want user to directly join the Precall or Videocall screen. By using this, we can avoid end users creating their own meetings.
Call Appbuilder API v1/create-channel from your server. For more details click here
We can use the API key generated in the pre-requisite step in the API call above. Project ID can be found the downloaded source code -> config.json
//Sample NodeJS code for create channel API call
const request = require("request");

const createChannel = () => {
  const options = {
    method: "POST",
    url: "https://managedservices-prod.rteappbuilder.com/v1/channel",
    headers: {
      "X-API-KEY": "<INSERT_YOUR_API_KEY>",
      "X-Project-ID": "<INSERT_YOUR_PROJECT_ID>",
      "Content-Type": "application/json",
    },
    body: JSON.stringify({
      title: "<INSERT_CHANNEL_NAME>",
    }),
  };
  request(options, function (error, response) {
    if (error) throw new Error(error);
    console.log(response.body);
    //response will contain channel details
  });
};

createChannel();
GENERATE TOKEN
The Generate Token API is used to generate a login token for the App Builder SDK.
Call Appbuilder API /v1/token/generate from your server. For more details click here
//Sample NodeJS code for generate token API call
const request = require("request");
const generateToken = () => {
  const options = {
    method: "POST",
    url: "https://managedservices-prod.rteappbuilder.com/v1/token/generate",
    headers: {
      "X-API-KEY": "<INSERT_YOUR_API_KEY>",
      "X-Project-ID": "<INSERT_YOUR_PROJECT_ID>",
      "Content-Type": "application/json",
    },
    //optional - for tracking the user
    body: JSON.stringify({
      user_id: "<INSERT_UNIQUE_USER_ID>",
    }),
  };
  request(options, function (error, response) {
    if (error) throw new Error(error);
    console.log(response.body);
    //response will contain user and token details
  });
};

generateToken();
LOGIN
STEP 1
The module is installed with the same name as your App Builder project. Import it just like any other node module into your desired React component.
import AgoraAppBuilder from "@appbuilder/react";
STEP 2
After importing the module your App Builder project can be rendered using the View property on the imported AgoraAppBuilder object.
Make sure to provide necessary styling including a width, height and display flex on the parent element of the View component for proper scaling.
login method accepts a JWT token generated from App Builder API call. For more details click here
const App = () => {
  const authenticate = async () => {
    await AgoraAppBuilder.login("<PASS_TOKEN_GENERATED_FROM_API_CALL>");

    //optional
    //if you want to skip user to see the create screen and navigate user to directly to precall screen
    //MEETING_ID generated from Create Channel API
    //await AgoraAppBuilder.joinPrecall("<INSERT_YOUR_MEETING_ID>");
    //more details check the joinPrecall methods
  };

  useEffect(() => {
    authenticate();
  }, []);

  return (
    <div style={{ display: "flex", width: "100vw", height: "550px" }}>
      <AgoraAppBuilder.View />
    </div>
  );
};
STEP 3
Start the development server inside your React project directory with the following command
npm run start
STEP 4
You should now see your App Builder project being displayed in your desired React component with Authentication enabled.